前回は赤外線リモコンの基本について学びました。
非営利団体 金重総合研究所 - 知...
Project 23.1 赤外線リモコン/Infrared Remote Control - 非営利団体 金重総合研究所
前回はキーパッドとサーボの連携と、コードのスリム化について学びました。 今回は赤外線リモコンの使い方を学びまし
今回は赤外線リモコンを使用してLEDを操作してみましょう!
目次
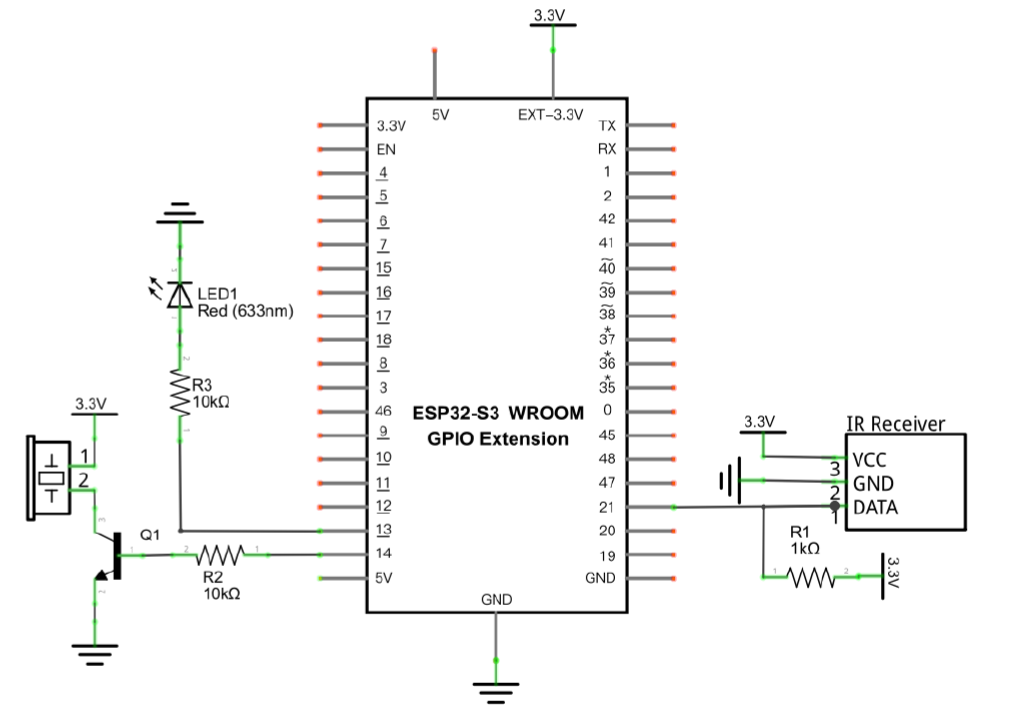
回路図
接続図
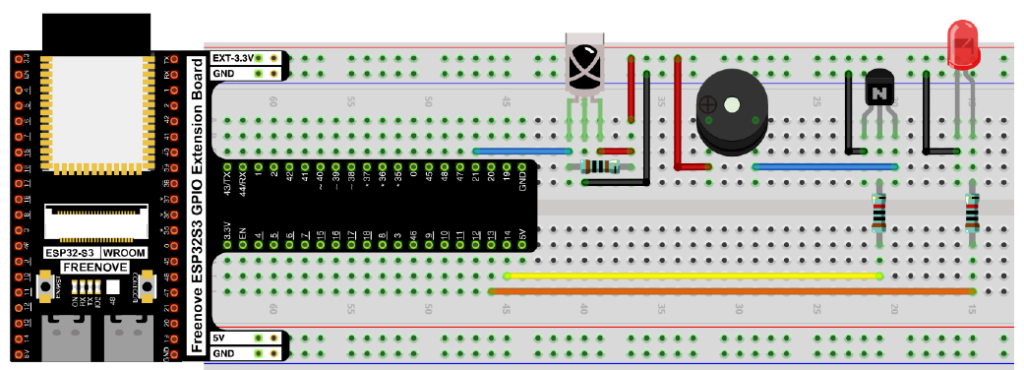
前回の回路だと抵抗が10KΩだったところが1KΩに変更になっていますので、注意してください。
コード
/**********************************************************************
  Filename    : Control LED through Infrared Remote
  Description : Remote control the LED with the infrared remote control.
  Auther      : www.freenove.com
  Modification: 2022/10/26
**********************************************************************/
#include <Arduino.h>
#include <IRremoteESP8266.h>
#include <IRrecv.h>
#include <IRutils.h>

const uint16_t recvPin = 21;  // Infrared receiving pin
IRrecv irrecv(recvPin);       // Create a class object used to receive class
decode_results results;       // Create a decoding results class object

int ledPin = 13;              // the number of the LED pin
int buzzerPin = 14;           // the number of the buzzer pin

void setup()
{
  //Initialize the ledc configuration
  ledcSetup(0,1000,8);                  //set the channel,frequency,esolution_bits
  ledcAttachPin(ledPin,0);              //attach the channel to GPIO pin
  pinMode(buzzerPin, OUTPUT);           // set buzzer pin into output mode
  irrecv.enableIRIn();                  // Start the receiver
}

void loop() {
  if (irrecv.decode(&results)) {        // Waiting for decoding
    handleControl(results.value);       // Handle the commands from remote control
    irrecv.resume();                    // Receive the next value
  }
}

void handleControl(unsigned long value) {
  // Make a sound when it rereives commands
  digitalWrite(buzzerPin, HIGH);
  delay(100);
  digitalWrite(buzzerPin, LOW);
  // Handle the commands
  switch (value) {
    case 0xFF6897:              // Receive the number '0'
      ledcWrite(0, 0);          // Turn off LED
      break;
    case 0xFF30CF:              // Receive the number '1'
      ledcWrite(0, 7);          // Dimmest brightness
      break;
    case 0xFF18E7:              // Receive the number '2'
      ledcWrite(0, 63);         // Medium brightness
      break;
    case 0xFF7A85:              // Receive the number '3'
      ledcWrite(0, 255);        // Strongest brightnss
      break;
  }
}
プログラムとしては難しいところは無いですね。41行目のswitchは条件分岐の一種で、valueの値がどうだったら~という形で分岐しています。ifだとtrueかfalseにしか分けづらいですし、else ifも大量に書くと見づらくなりますが、ケースがいくつもあるような場合はswitchのほうがシンプルで良いと思います。
動作
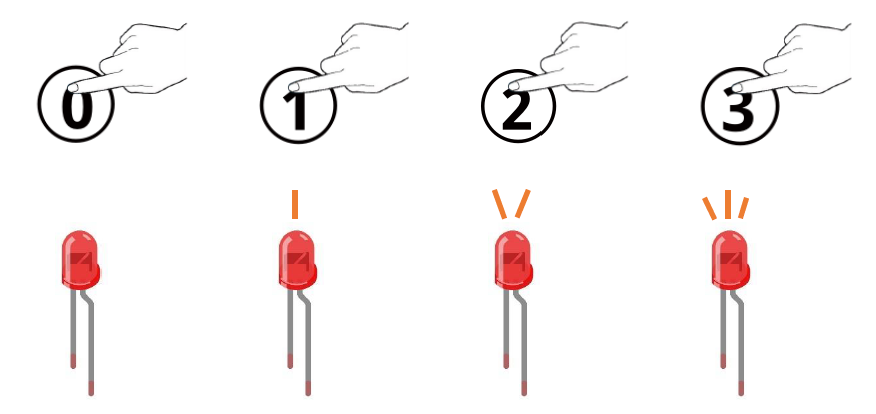
ESP32-S3 WROOMにコードをコンパイルしてアップロードしてください。赤外線リモコンの「0」、「1」、「2」、「3」ボタンを押すと、ブザーが1回鳴ると同時に、LEDライトの明るさがそれぞれに対応して変化します。
次回は湿度センサーを使用して湿度を測定してみましょう!
非営利団体 金重総合研究所 - 知...
Project 24.1 温湿度計/Hygrothermograph - 非営利団体 金重総合研究所
前回は赤外線リモコンでLEDの明るさを制御してみました。 湿度計は、私たちの生活の中で温度と湿度を測定する重要

コメント